Black and White Conversions
Here's a quick tip on convert color images to black and white. It's straight from the Adobe Website and it's free. No high dollar plug ins.

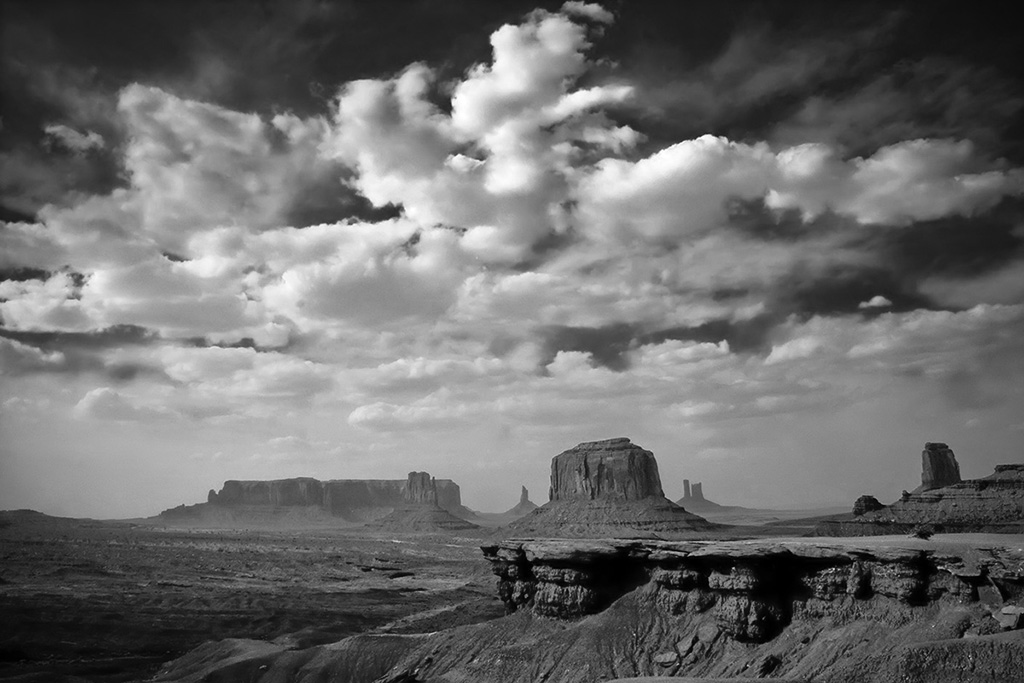
 First open your color image and create an adjustment layer. It's the little circle at the bottom of the layer's palette. Select "Hue/Saturation" and pull the saturation slider to zero. (Click on these examples to read.)
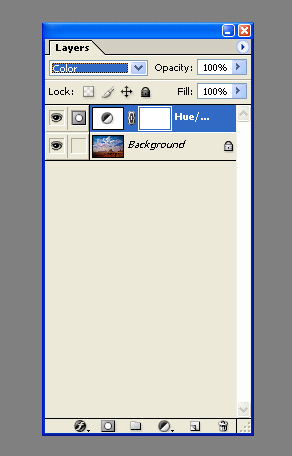 Hit enter and select color as the blend mode. (The blend mode is near the top of the layers palette just under the word "Layers".)
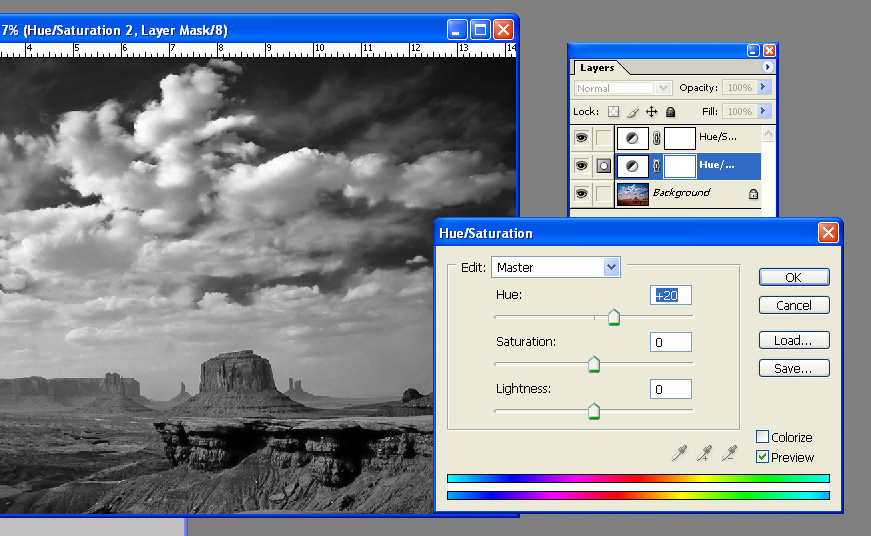
Now select the bottom layer and put another adjustment between your photo and the first adjustment layer. Now adjust the hue slider, which acts as a filter, to taste. You can add another curves or levels adjustment layer on the very top if needed. Flatten and save. You can make this into an action and double click on the adjustment layers to change them. You can also add a photo filter to add a tint. This of course is just one of the many ways PhotoShop offers, but it's the one I use most often.
If you do a lot of black and white work you should think about upgrading to CS3 which has a killer adjustment for converting color to black and white. You also have the same amount of play in Lightroom, but for those of you who don't have the cash (or like in the bank where it belongs) this old trick works in PhotoShop and most photo editing programs.
Labels: Photoshop
posted by Craig Wolf Photography at
11:03 AM
![]()

<< Home